Latest Posts

You've seen them on Buzzfeed, Metro and all over Instagram. So we decided to see what all the hype was about.


Molly Bakes is a well known Dalston based bakery which opened a cafe earlier on this year. Since then, their Australia-invented "Freakshakes" have brought them rapidly to internet fame, with the shakes being featured by the likes of Buzzfeed, Metro and even with Holly and Phil on This Morning. So, naturally, we had to go and give them a try.

The cafe itself is a tiny, cute building on Kingsland Road in Dalston. From the outside you wouldn't think it was particularly special, aside from the large queue of people crowding to get in. The cafe seats only around 20 people, hence the queues, and as soon as you walk through the door you are presented with a huge selection of cakes and cookies, as well as the sight of staff making the infamous Freakshakes.

The shakes come in a small variety of flavours: Chocolate, Caramel, Raspberry or Peanut Butter and cost £7 each. Expensive for just a milkshake, one might think, but these are not just milkshakes. The shakes are made with locally sourced ice cream and basically have an entire extra dessert stacked on top of them...


So I decided to try the raspberry shake, and Ruth tried the caramel. The raspberry shake is made with ice cream, fresh raspberries and milk, with Marshmallow Fluff smeared around the top of the glass. The shake is then topped with whipped cream, freeze dried raspberry pieces, raspberry jam, an entire chocolate brownie and a piece of homemade toasted marshmallow.

The caramel shake is made with ice cream and caramel sauce, with more caramel sauce lavishly smothering the top of the glass. It is then topped with cream, more caramel sauce, brownie and marshmallow the same as the raspberry shake. 

Aesthetically, it's hard to dispute that the shakes look awesome. Complete with a red stripey straw, they are undeniably inviting to look at and certainly have the 'woah' factor. But how do they taste, you ask?

The raspberry shake: Well, kinda disappointing, actually. Sadly whilst the use of fresh raspberries gives the shake a more luxurious edge, they just don't harbour the same level of flavour as a jam or sauce would, thus making the consumer long for a stronger raspberry 'kick'. Indeed, it's clear that this is a very high quality ice-cream based shake, but unfortunately it lacked in flavour for me a little. However, I really loved the raspberry pieces around the edges and the extra texture provided by the little lumps of marshmallow fluff; and the home baked chocolate brownie was a celebration of chocolatey, gooey loveliness in my mouth.
My score: 7/10. Slightly flavour-deprived, but more than made up for in amazing aesthetics and toppings.  

The caramel shake: Everything you'd expect from a caramel milkshake... thick, milky and far. too. sweet. So much so that even with a joint effort between the two of us, we literally couldn't finish the thing. The problem here is it's sugar, topped with cream, topped with chocolate, topped with more sugar. There's nothing to cut through the sweetness and to quote 'you can literally feel diabetes happening right now'. Again, the brownie and marshmallow make a nice addition, but the sickly-sweetness was too much for us, inducing stomach pains and sugar-crash headaches.
Ruth's score: 6/10. In all fairness, you have to expect a caramel milkshake to be pretty sweet. But this was a little too much. Again, aesthetics and the brownie picked this score back up.

Don't get us wrong, these Freakshakes are certainly an experience and well worth the money, given the sheer volume of shake and extra ingredients that go into making them look so special. But there is some room for improvement here, guys! Rumour has it that the team are developing some new flavours; we'll certainly be visiting to try them out.



This week I've been experimenting! A good friend gave me two huge bags of rocket from his farm, so I decided to give this a go. Nice and easy and very tasty!


Makes 1 Jar.

Ingredients

80g rocket leaves
4tbsp extra virgin olive oil
2 cloves garlic
Juice of 1 lemon
30g parmesan, cut into small cubes
Small handful walnuts, toasted

Method

1. Place rocket and olive oil into a blender or pestle and mortar and blend until combined but still quite chunky.

2. Add parmesan and garlic cloves and blend to form a paste. If the blender gets stuck, pulse it a little bit to break up the bits of parmesan and walnut.

3. Stir in lemon juice to taste.

4. Enjoy spread on chicken breasts and grilled, or with pasta.

Note: this is a recipe you can tweak to your taste. I added a little more cheese to mine (because you can never have too much cheese in my eyes). Play around and see what suits you!


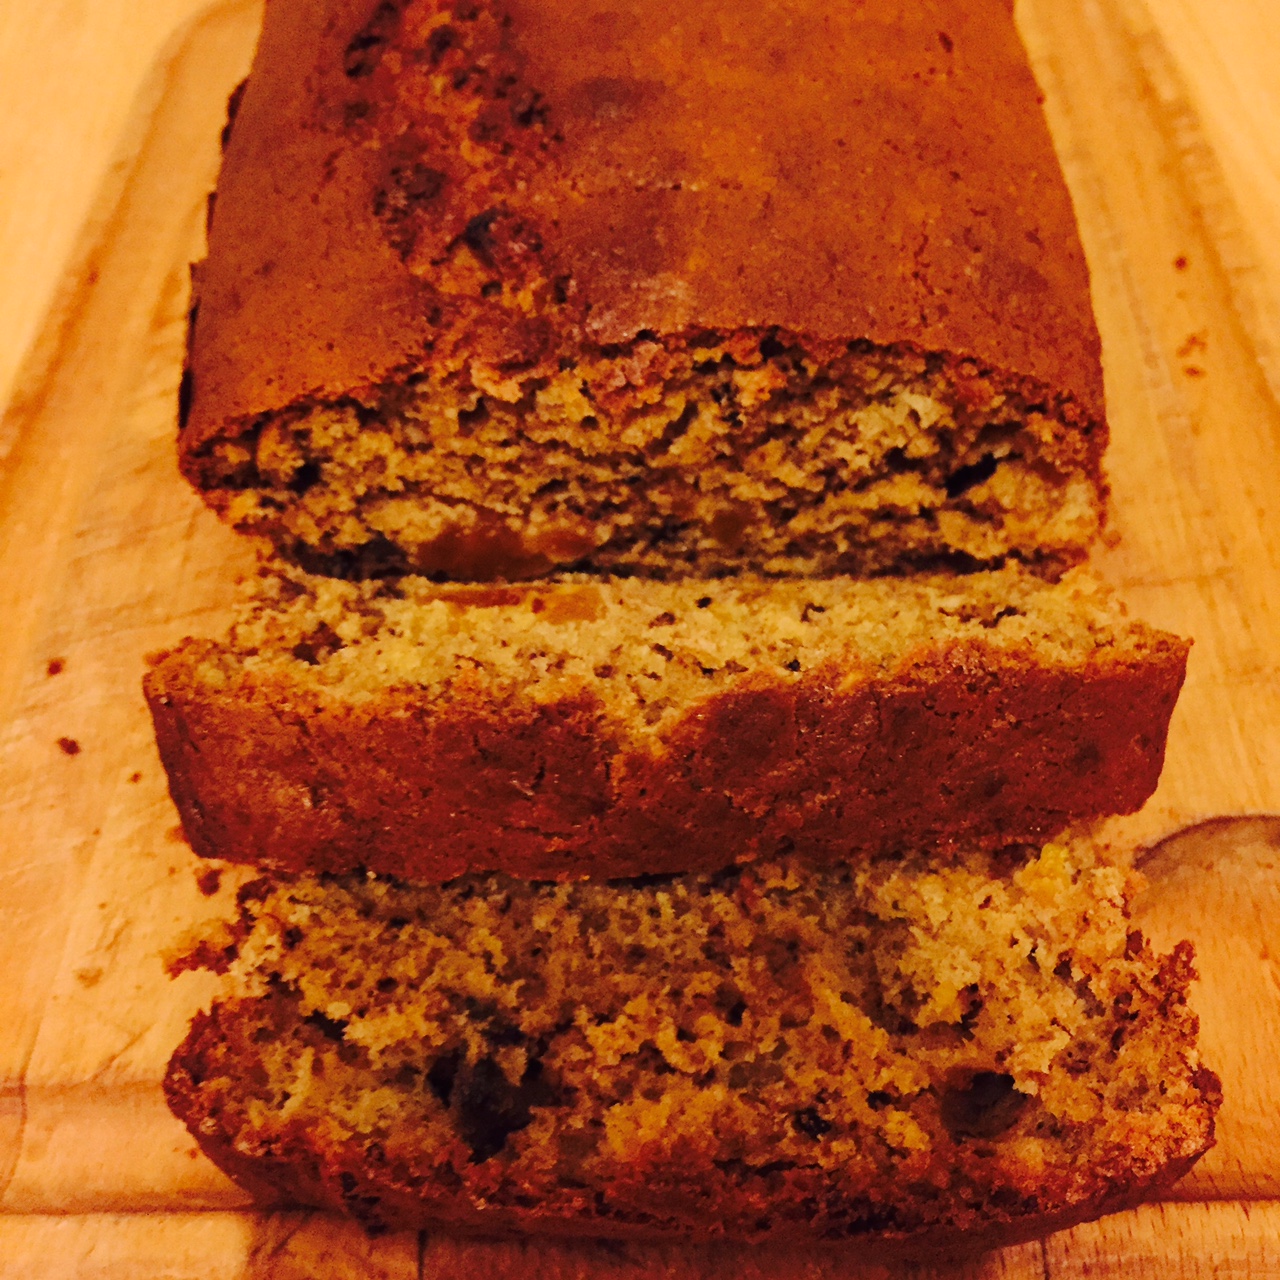
This is an absolute family favourite, and a great way of getting rid of any overripe bananas you have lying about. Great on it's own or with a bit of butter.


Ingredients

3 very ripe bananas, mashed
6oz soft brown sugar
3oz margarine/butter
2 eggs, beaten
7oz self raising flour
1/4 tsp bicarbonate of soda
1 tsp cinnamon
2oz walnuts, chopped
2oz dates/other dried fruit (I used apricots in this one!)

Method

1. Preheat your oven to 180 fan. Grease and line a medium sized loaf tin. 

2. Combine all ingredients and beat together using an electric whisk (or elbow grease...)

3. Bake in the oven for around 45 minutes to 1 hour, or until a skewer put into the cake comes out clean. Once out of the oven, cool on a cooling rack fully before carving (or it'll fall apart!)

4. Enjoy on it's own or with a little butter.

It's British National Pie Week! So of course, I made a Greek pie. This was really quick and tasted amazing. And as usual, minimal ingredients! Can you tell I had some left over pesto from my courgetti the other night....?

Ingredients:

1 Pack filo pastry
2 Cloves garlic
200g Spinach (I used frozen spinach because it's cheap and lasts longer)
100g Feta cheese
50g Pine nuts
2 Eggs
2 Tbsp red pesto
Salad, to serve

Method:

1. Preheat the oven to 180 fan. Prepare your filo pastry. Take about 50cm baking parchment, scrunch it up and then straighten it out again (this makes it easier to stuff into a pie tin). Brush all over with olive oil. Then start to layer the filo sheets to cover most of the baking parchment, brushing each layer with a small amount of olive oil. Build this up until you have 3-4 layers of filo sheets. Then lift the filo on the baking parchment into a medium sized circular pie dish (I used a standard sandwich cake tin).

2. In a frying pan, toast your pine nuts and set to one side. Meanwhile, chop the garlic, then add the garlic and spinach to the frying pan with a little olive oil and cook until the spinach has wilted. Once the spinach is cooked, it will have released quite a lot of water. Sieve the spinach to get rid of all the water, otherwise you'll have a soggy bottom!

3. Whilst your spinach is cooking, beat the two eggs then crumble in the feta and add the pine nuts and pesto. Add the spinach and garlic mixture and combine. Now place the mixture into the pie tin on top of the filo, and fold the excess filo over the top of the mixture to close the pie. Brush with a little more olive oil, and bake in the oven for around 20-25 minutes, until the top is crisp and golden.

4. Slice and serve with salad. Yum!!
For Christmas, my lovely auntie gave me a spiralizer and ever since I've been trying to perfect courgetti. Well today I did it! Courgetti is a great, carb free substitute for pasta, great if you're slimming down or just want to add some extra veg to your pasta dishes! If you don't have a spiralizer very finely sliced courgette/courgette ribbons made with a potato peeler will work too. Have a play around!


Ingredients:

1 Courgette per person
2 Tablespoons red pepper pesto
1 Small handful pine nuts
3 Rashers of smoked back bacon
Handful of peas
Grated parmesan, to serve (optional).

Method:

1. Make your courgetti. Wash, top and tail your courgette and cut it in half width ways. Stick half the courgette onto the prongs of your spiralizer and, using the medium-thick spaghetti attachment slowly start to turn your spiralizer handle until the courgette comes through the other end. Do the same for the rest of the courgette.

2. Dice the bacon into small squares and fry until crisp. About half way through frying, add the pine nuts to toast them.

3. Once the bacon is cooked, stir in the pesto, peas and courgetti. Heat for 2-3 minutes, making sure all the courgetti is coated. Don't heat it for too long, or your courgetti will go soft and slimy in texture.

4. Serve with a sprinkling of Parmesan cheese. Enjoy!

Lemon drizzle cake truly is one of my favourite cakes of all time, and every time I make this one I get asked for the recipe. A friend last week (a lemon drizzle connoisseur, if you will) told me that this is the best one she's ever had. Praise indeed! Super simple and super tasty, try it yourself :)


Ingredients:

225g self raising flour
225g butter/margarine
225g caster sugar, plus 5tbsp caster sugar for the drizzle
4 eggs
Zest and juice of 1 fresh lemon

Method:

1. Grease and line a medium sized loaf tin. Preheat the oven to 180 fan.

2.  In a large mixing bowl, whisk together the flour, butter, sugar, eggs and the lemon zest. 

3. Bake in the loaf tin for about 40 minutes, or until a skewer stuck into the cake comes out clean. Whilst the cake is still in the tin, use a skewer or knife to poke lots of small holes into the cake all the way through. 

4. Mix 1tbsp of the caster sugar into the lemon juice in a jug. Pour most of the mixture over the cake so that it sinks into the holes, leaving about a teaspoon full left in the jug. Leave the cake in the tin for about 10 minutes to allow the juice to full absorb, then transfer onto a cooling rack to cool completely.

5. Once the cake has cooled, add the final 4 tbsp of caster sugar to the remaining lemon juice to make the drizzle. Once mixed, the drizzle should be -just- about pourable, but not too viscous. If it's too runny it will just run off the cake, in this case add a little more sugar until it's thicker. If it doesn't pour at all, add a tiny drop of water. Drizzle over the cake in your desired pattern and leave to harden.

6. Cut into slices and enjoy!


This is something I've experimented with for a while in a quest to try and recreate the perfect satay chicken with minimum ingredients. Unfortunately, the internet is filled with hundreds of variations of this recipe, all of which contain hundreds of ingredients, too! On first glances this recipe also looks alarmingly bulky in its ingredients. But give it a second look and you'll realise that most ingredients are used more than once in the different elements to this meal. Not only that, but these ingredients are basics that most people already have in the cupboard! Sneaky eh?

Give this one a go if you simply ain't got time to go seeking out lemongrass and fish sauce...


Cupboard to plate in: 20 minutes
Serves 2

Ingredients:

For the chicken:

  • 2 breasts of chicken (or large thighs if, like me, you're a cheapskate)
  • 1 teaspoon of honey
  • 1 teaspoon of soy sauce
  • A drizzle of oil
For the satay sauce:
  • 1 tablespoon of smooth peanut butter
  • 1/2 teaspoon of honey
  • 1 teaspoon of soy sauce
  • 1/4 teaspoon of cayenne pepper
  • 1/4 teaspoon of ground ginger
  • 1/4 block of creamed coconut
  • 2 spring onions, chopped
For the egg fried rice:
  • About 3 handfuls of rice 
  • 3 spring onions, chopped
  • 1 egg
  • 1 handful of frozen peas
  • 1 handful of frozen sweetcorn
  • 1 tablespoon of soy sauce
Method:

1. Preheat oven to 180 degrees (fan). Put the rice on to boil for 10 minutes. Drain and leave to one side. Meanwhile, score the chicken breasts in a criss-cross formation. Mix the honey, oil and soy sauce together and drizzle over the chicken breasts. Place on a baking tray and roast for around 15 minutes, until cooked through. If you're feeling really fancy and Indonesian, you could cube the chicken and grill it on a kebab skewer, this will make the chicken extra tender and also saves a little bit of time cooking. 

2. Make the satay sauce. Fry off the spring onions in a pan with a little oil. Add the creamed coconut and a splash of boiling water and stir until dissolved. add the peanut butter, honey, soy sauce and spices and stir. 

3. Fry the rice. Fry the rest of the spring onions in a little oil until softened slightly. Crack the egg into the pan and stir around until completely cooked, and broken up into small lumps. Add the cooked rice, sweetcorn and peas and stir in the soy sauce. 

4. Serve! Place the cooked chicken onto a bed of the fried rice, and place the satay dipping sauce on the side.

Enjoy!